Alpine Overview & Linux Refresher
This block introduces Alpine, CSU's HPC cluster, and the small subset of Linux you'll need for the rest of the workshop. We'll connect to the workshop server, claim an interactive compute node with sinteractive, and walk through the file-system layout, paths, and core commands you'll lean on every time you open a new terminal.
Introduction to Alpine
What is Alpine?
- The University of Colorado's High Performance Cluster (HPC) - they named it Alpine.
- Alpine is a supercomputer that is located at CU Boulder and CSU has access to using.
- Here are the docs on Alpine: https://curc.readthedocs.io/en/latest/clusters/alpine/index.html
- They also have a help desk: rc-help@colorado.edu
- They host tutorials and workshops regularly: https://curc.readthedocs.io/en/latest/getting_started/current-sem-trainings.html#
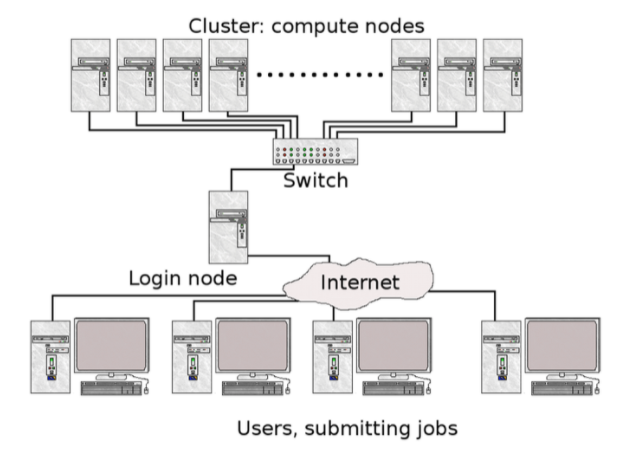
Basic System Architecture of Alpine When you are trying to visualize what a supercomputer looks like, you can picture something like this:
- compute nodes (top) are the worker bees, where computing gets done
- the switch connects all the compute nodes together so they can communicate
- the login node is the "front door" to the supercomputer
- the internet connects us to the supercomputer
More About Nodes
Alpine has different kinds of nodes. For the purpose of this class, you can think of a node as different computer modes where you are given different types of compute resources and are meant for running different tasks. You can access these nodes in several ways. Alpine has 4 different types:
1. Login node - THE FRONT DOOR
- This is where you "land" when you login
- Do not run commands while in login
Primarily used for script editing and job submissions only
2. Compile node
- Translates human-readable source code that we give into computer-executable machine code
Primarily used to install software
- Use
acompileto start a compile session
3. Compute node
- We do not navigate into these
This is where jobs run after submission
- There are different kinds of compute nodes
- Here is a list of the compute node resources available on Alpine(https://curc.readthedocs.io/en/latest/clusters/alpine/alpine-hardware.html)
- Use
sbatchto submit jobs
4. Interactive node
We can navigate here to run jobs and commands interactively
- We will use an interactive node to run our Qiime2 commands
- Use
ainteractiveto start an interactive session - We will primarily use this node!!
Node Types and Specifications
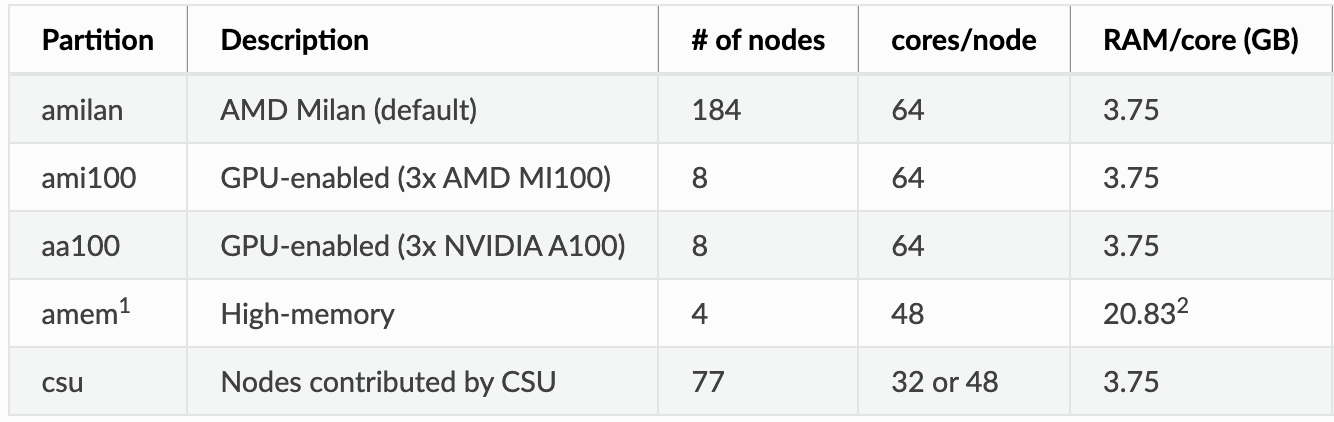
- AMD Milan compute nodes (nodes are like individual computers) and each node has a certain amount of cores (or power) with a certain amount of RAM (memory)
- These are the worker bees, where computing/calculations are run.
- 64 cores / node
- ~240 GB ram / node
- An average laptop has around 4 cores & 8-16 GB ram, so each node is about 16X more powerful than your average laptop
- This is what we will primarily use: name = amilan
- High memory AMD Milan compute nodes
- 48 cores / node
- ~1 TB ram / node (😱)
- name = amem
- GPU nodes - name = ami100 and aa100
Directories (fancy word for folders)
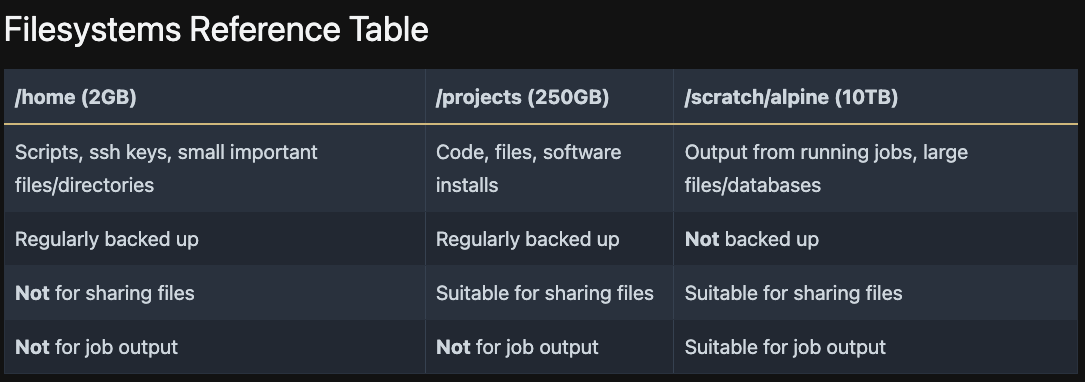
There are also different storage spaces within Alpine that are meant for different things.
-
Home directory
- /home/$USER
- Not for direct computation
- Small quota (2 GB) for storage
- Backed up
- Your /home directory is a good place to store source code, small compiled programs, and job scripts.
-
Scratch directory
- /scratch/alpine/$USER
- 10 TB quota - can ask for more if needed
- High performance storage for computation
Files are purged after 90 days of inactivity - Be careful about this!!! files are deleted and are not recoverable. you have to be diligent about saving your files from Alpine when you are done.
- Folders will persist, so it will fool you into thinking your files are safe.
-
Project directory
- /projects/$USER
- Mid-level quota (250 GB)
- Large file storage
- Not high performance storage
- Backed up - if you choose to use Alpine for long-term storage, this is where you keep your files
Filesystems Reference Table
Think of these spaces like folders on a computer, where "home" is a folder within "/" (root directory), and "$USER" is a folder within "home", and so on.
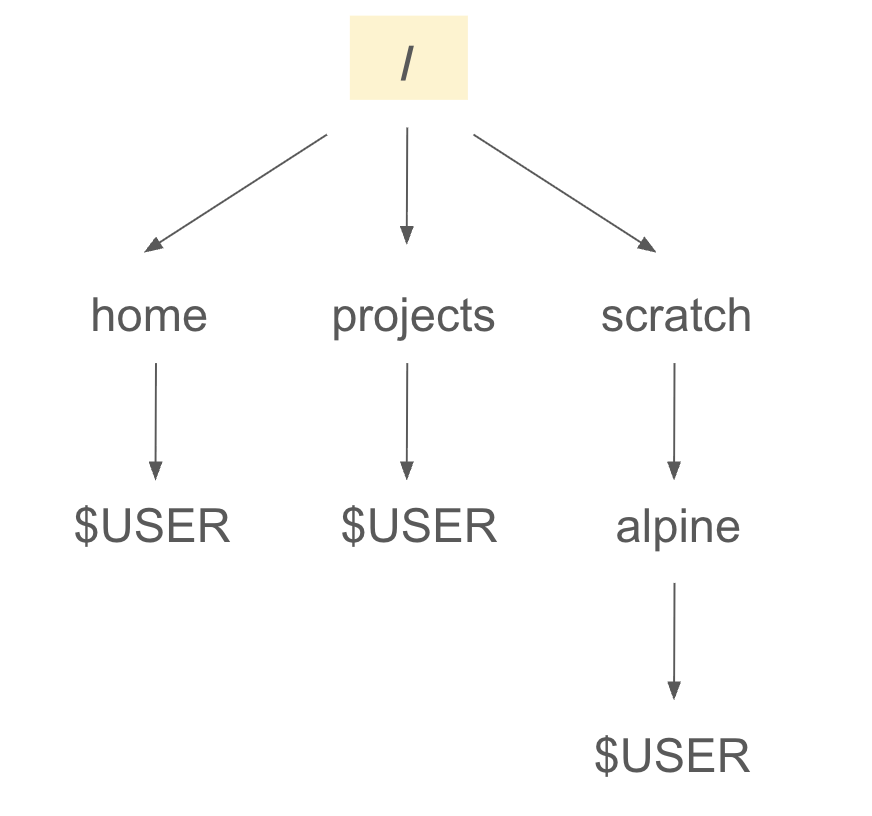
For this class, we will work in the scratch directory and back our files up to the projects directory. again this looks like:
- /scratch/alpine/$USER
Alpine documentation: https://curc.readthedocs.io/en/latest/ (can be really helpful!)
Logging into Alpine using OnDemand
We will use the On Demand website to launch a terminal window that will connect us to the Alpine cluster.
1. Navigate to ondemand-rmacc.rc.colorado.edu You should see this webpage:
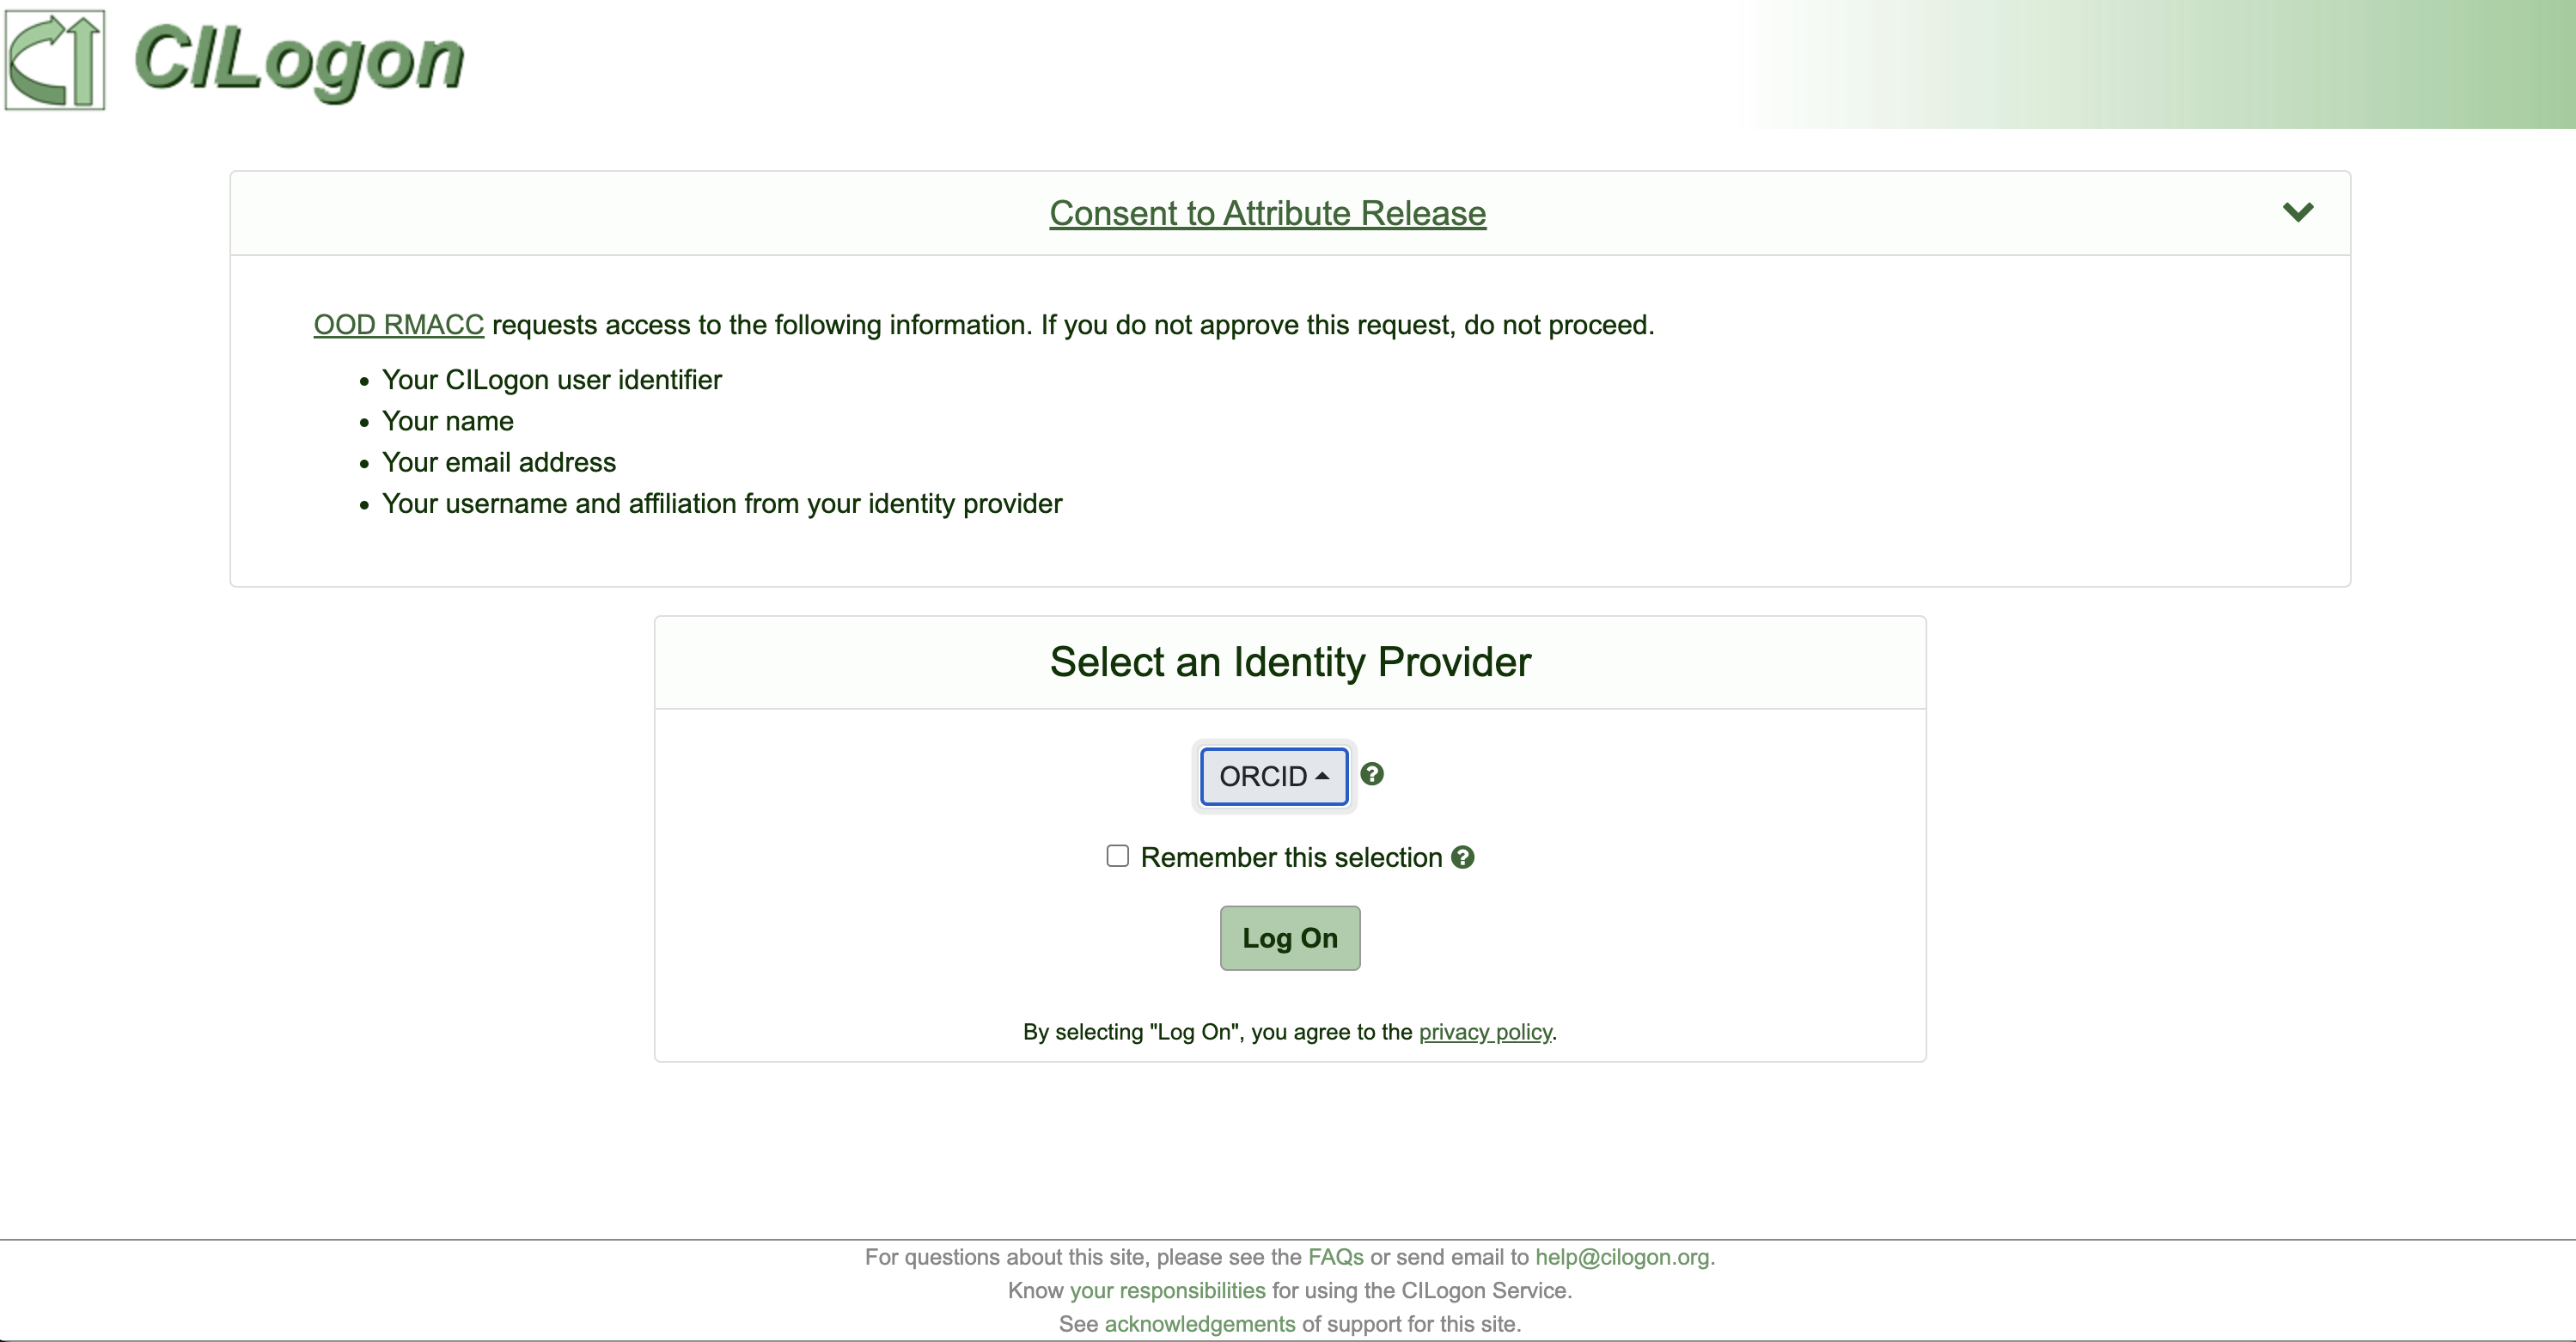
2. Change ORCID to Colorado State University (or your affiliated univeristy) and click Log On. If you accidently log in with the incorrect identity provider, then you will need to clear your browser history and cache and reload the OnDemand website to start over.
3. You will next be prompted to login with your NetID.
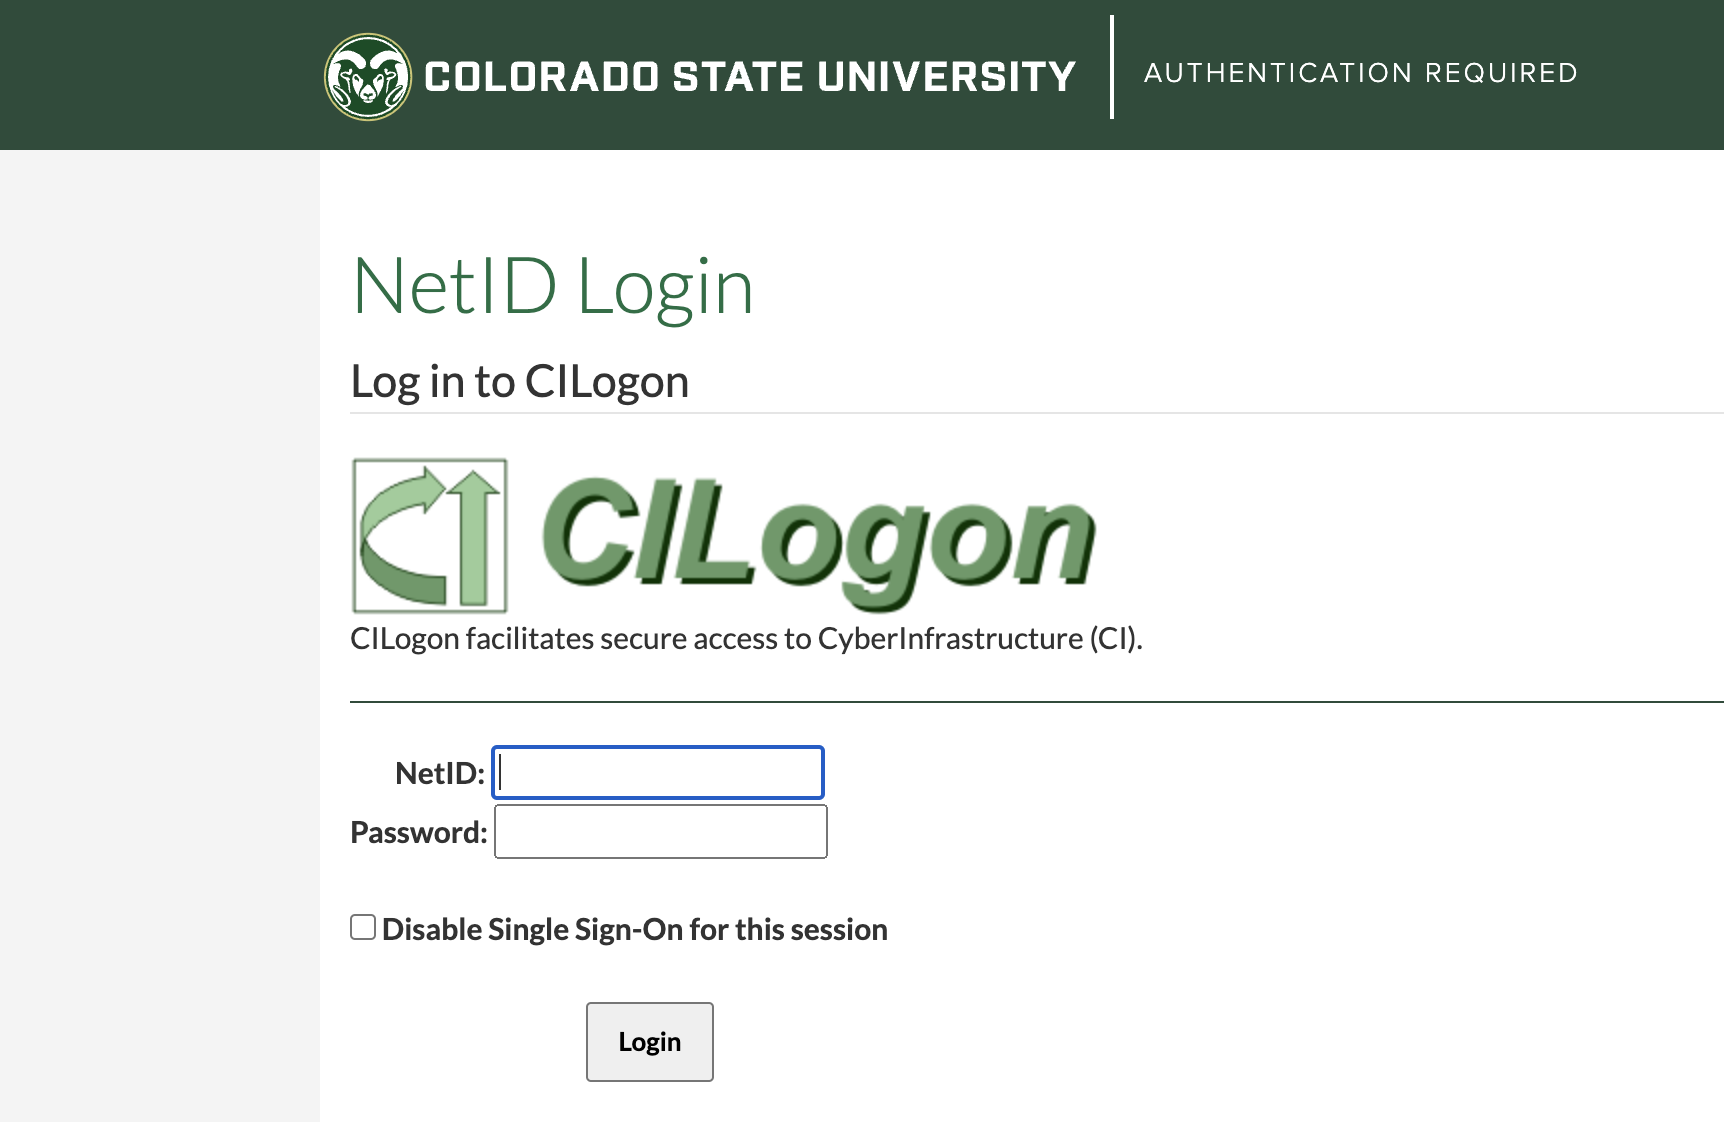
4. You will then be prompted to use Duo to authenticate.
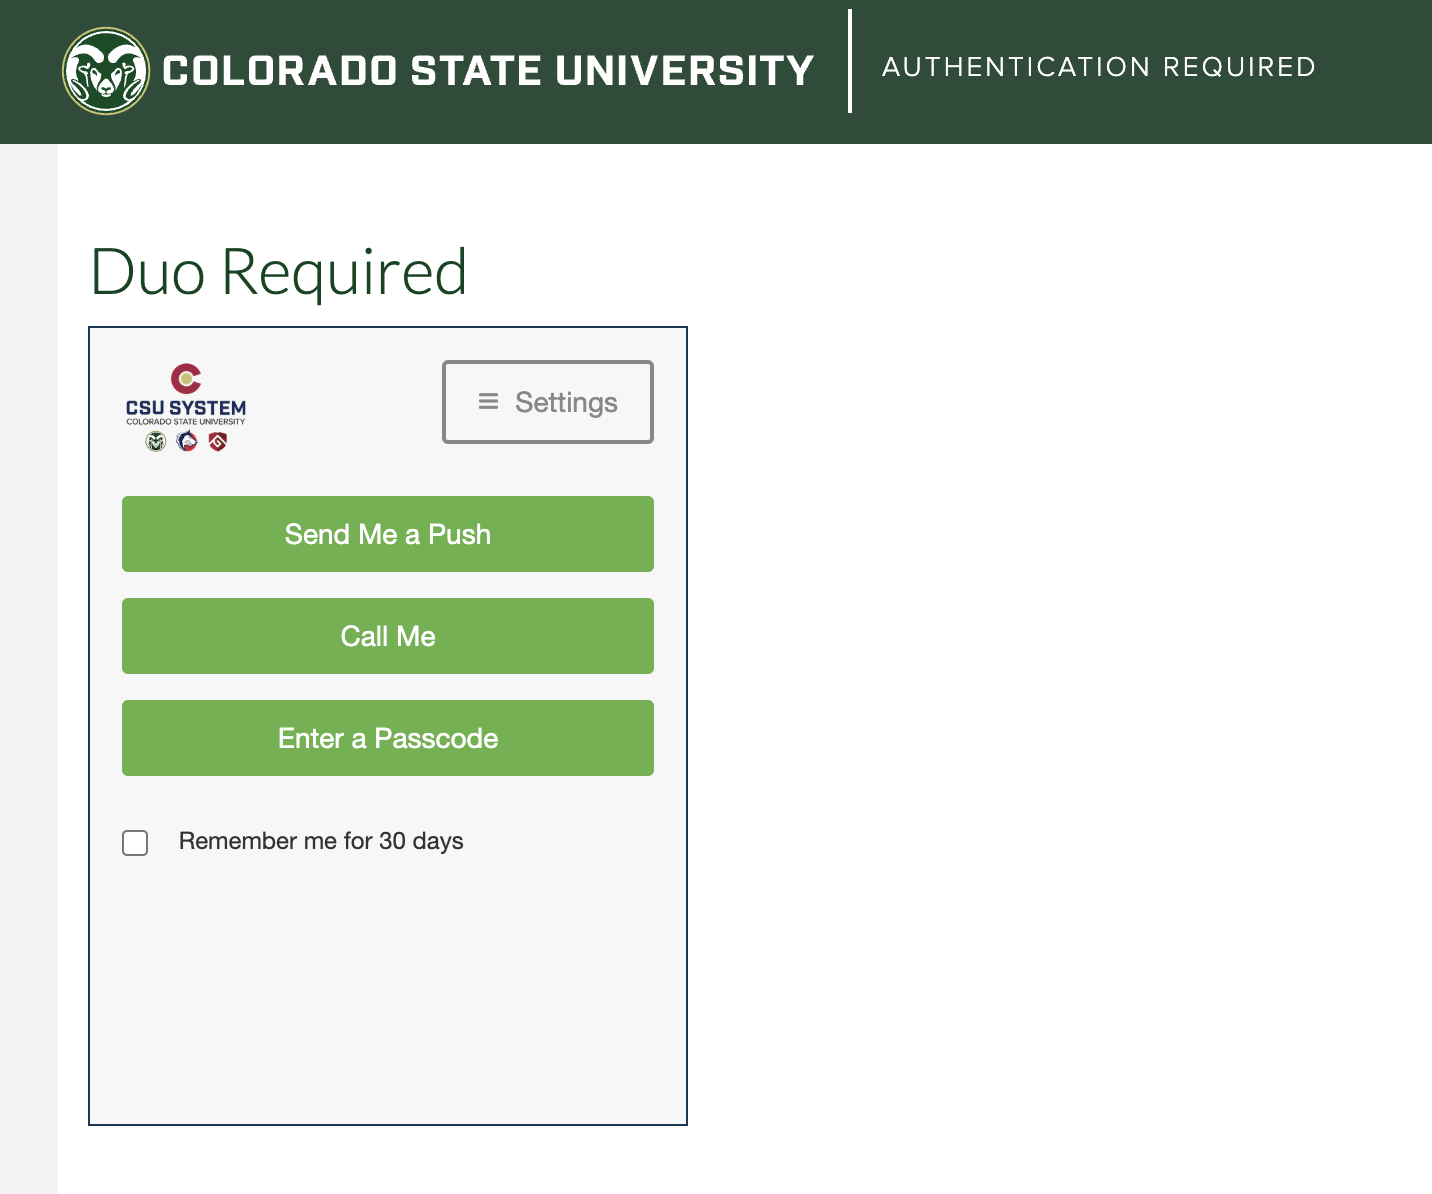
5. You should see the CU Research Computing OnDemand landing page. Once you log in, save this page as a shortcut or bookmark. we will use this page a lot, so easy access to it will be helpful.
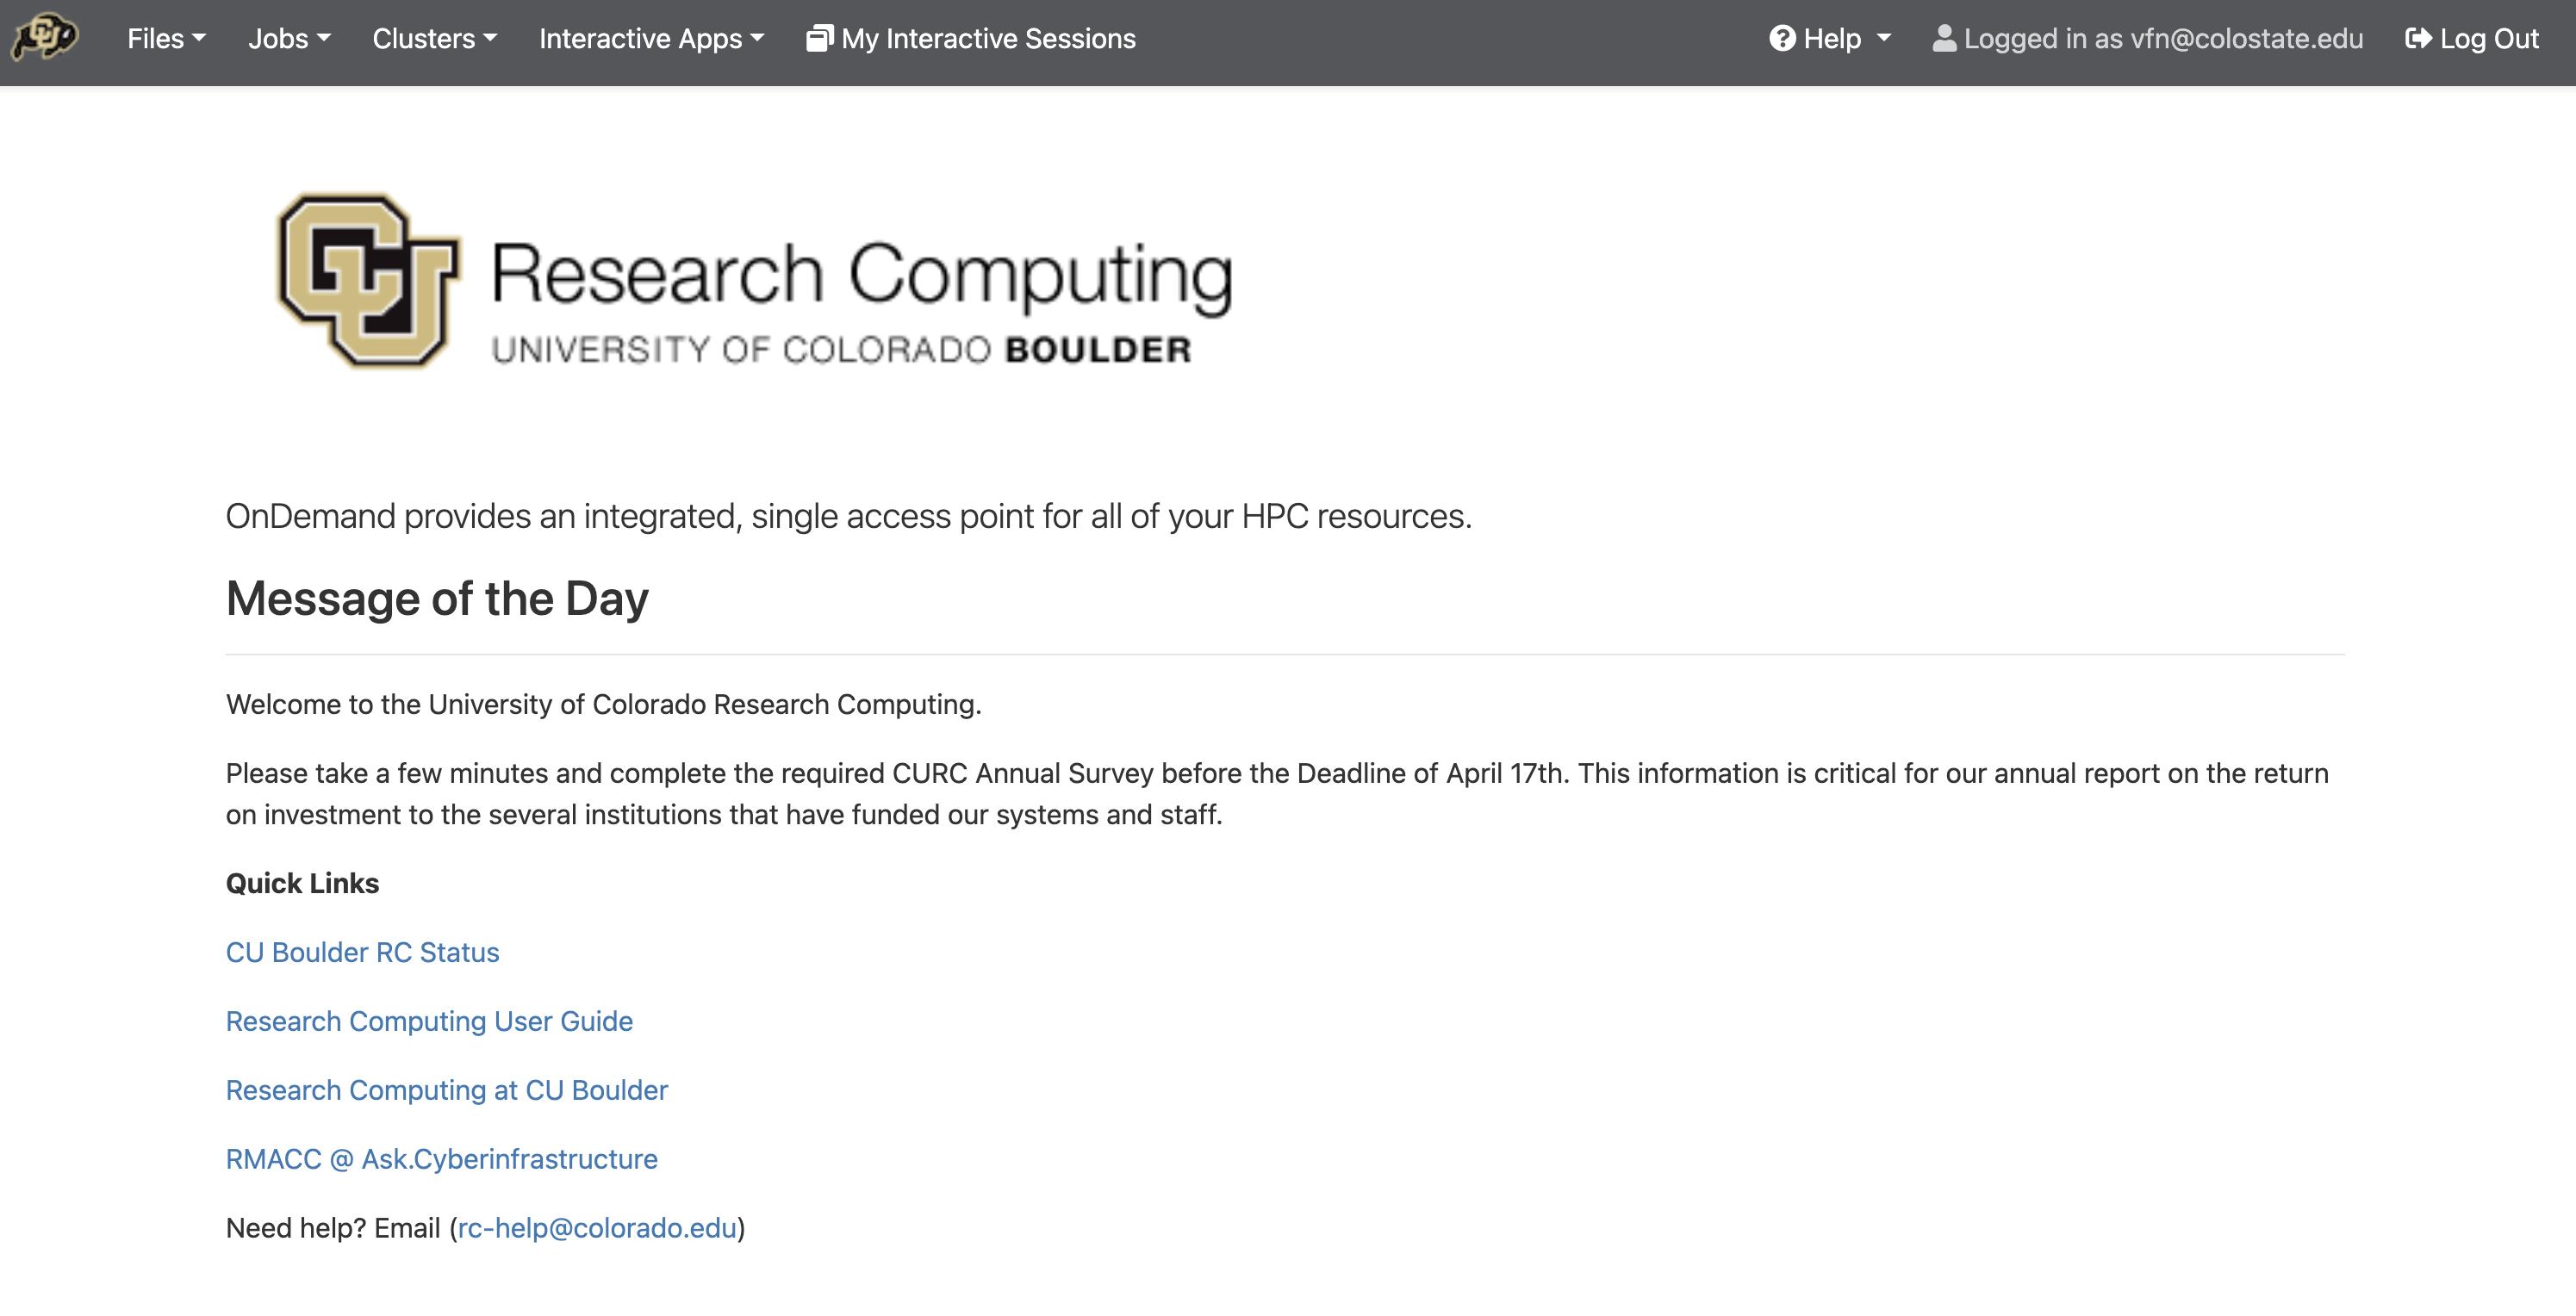
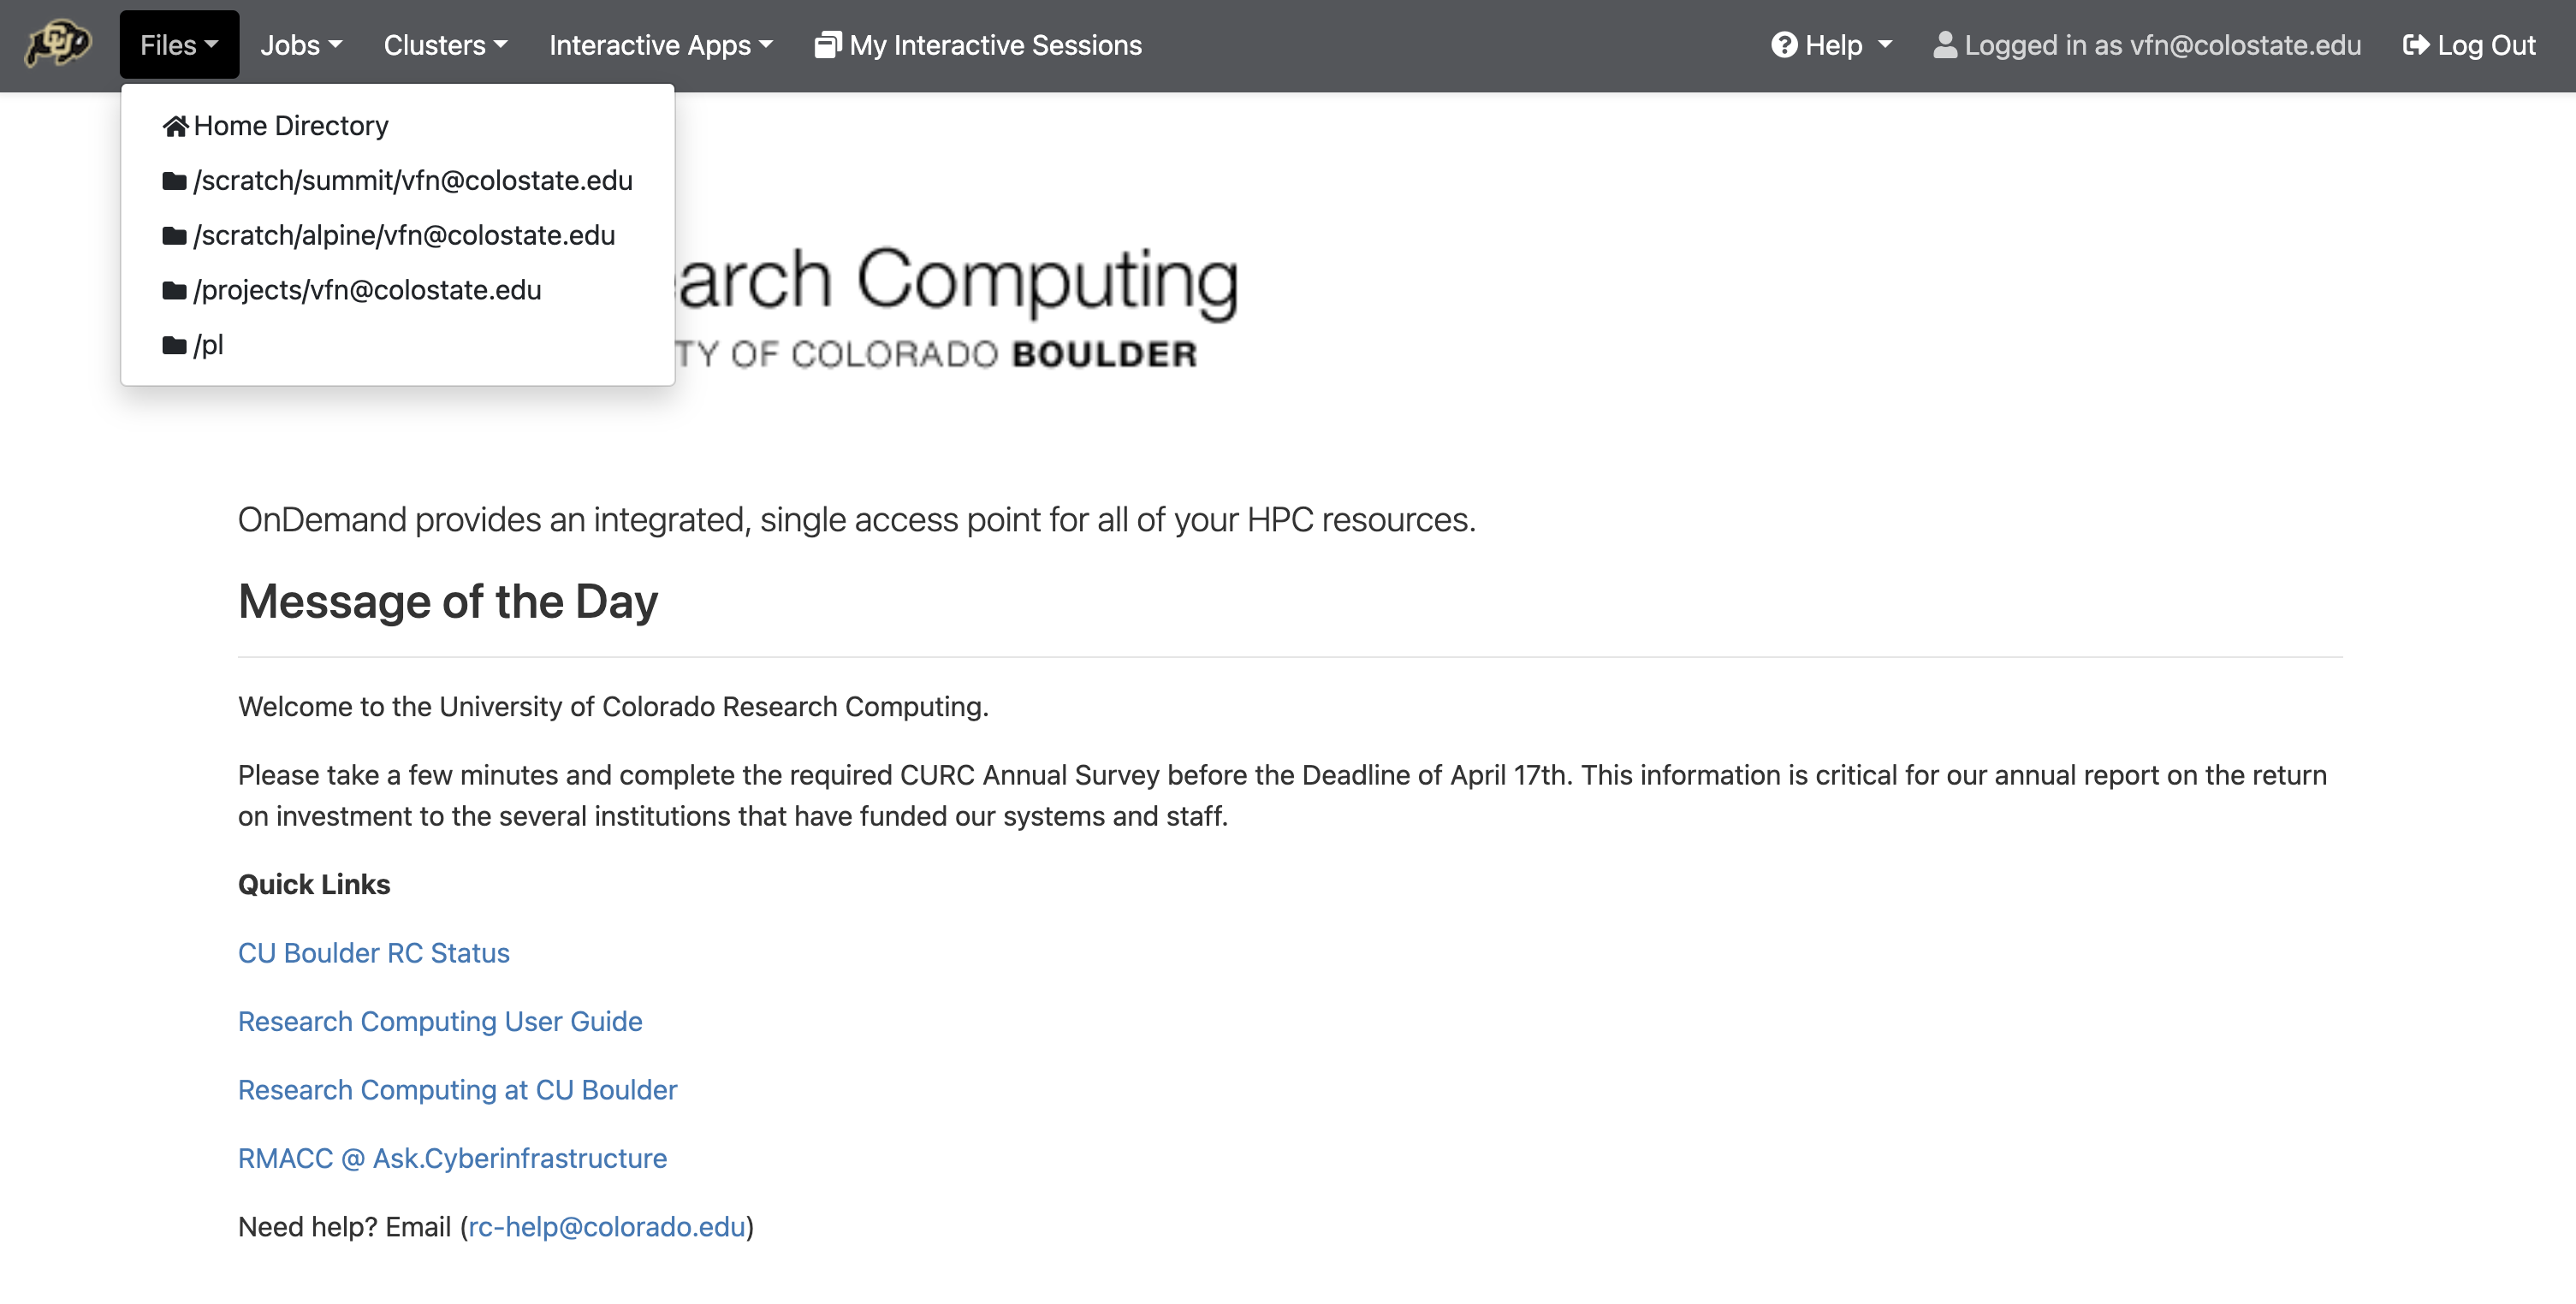
There are 3 paths under the "Files" tab, these are the same that we talked about above (you have a home, scratch, and projects folder). Remember, you will almost never use the "home" path, and for this class you won't use the "pl" path either. We will be working in the SCRATCH directory only.
6. Launch a terminal session by clicking on Clusters at the top and then select >_Alpine. This should open a new window that looks like this:
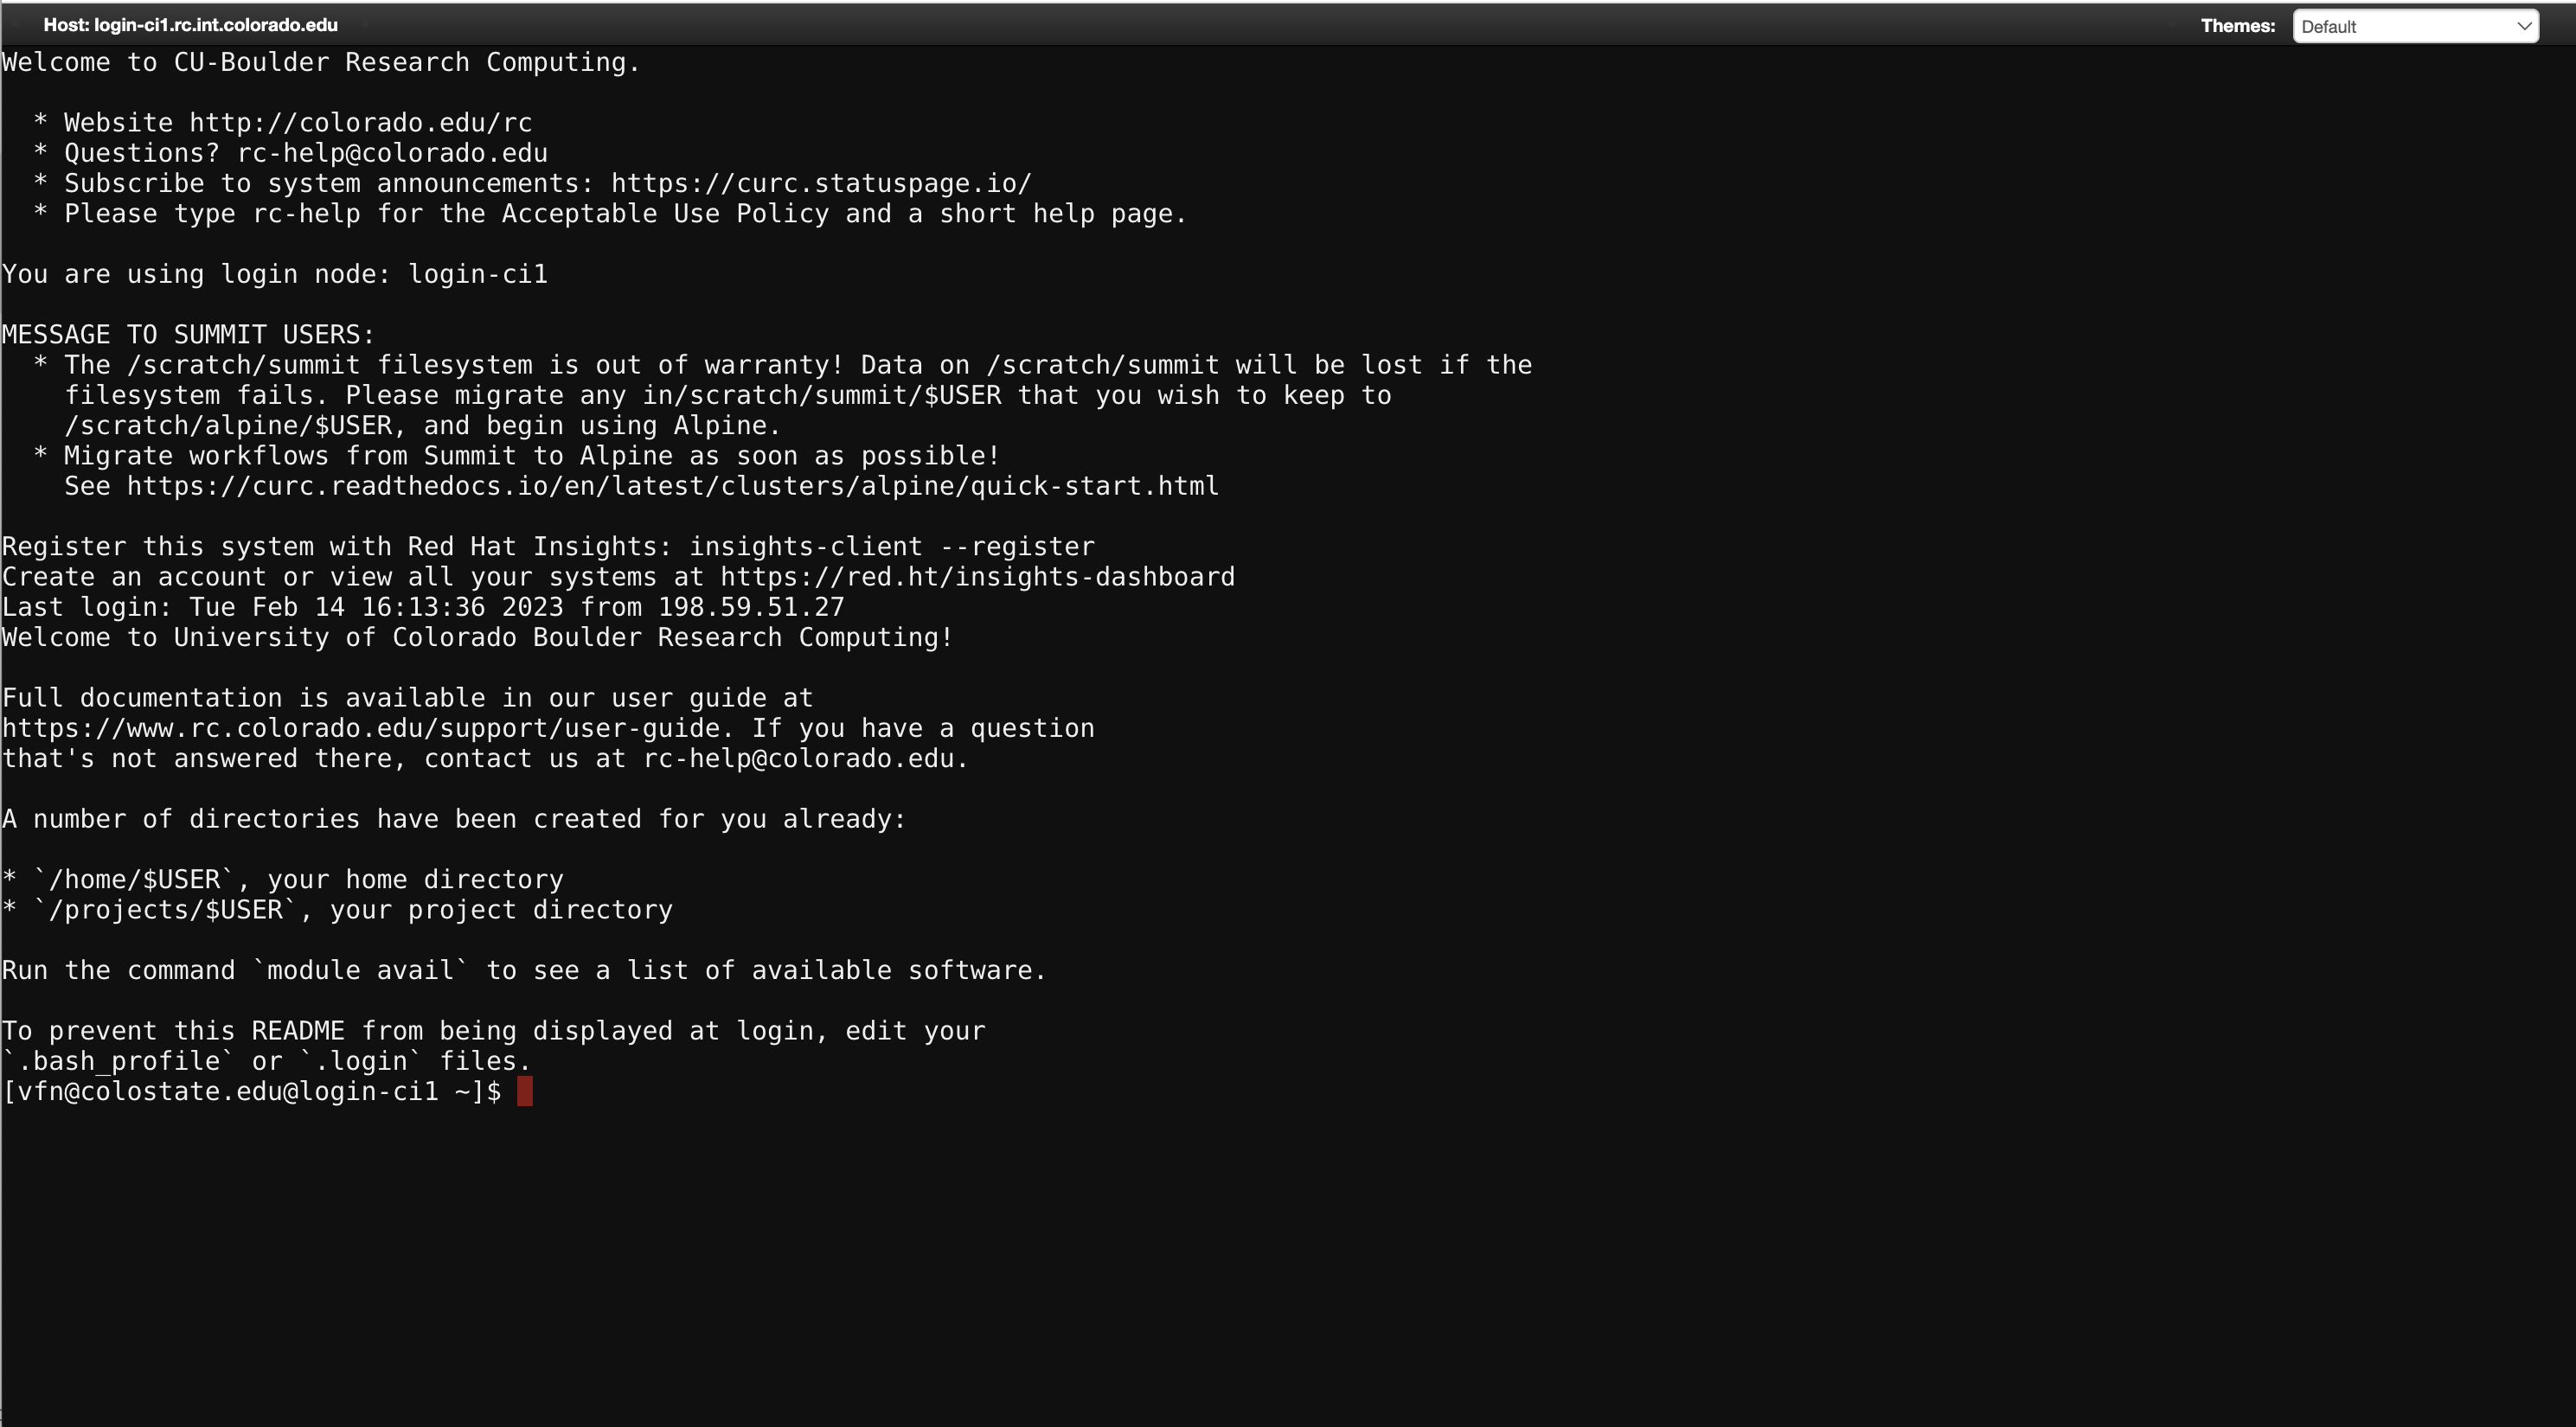
You have successfully logged into Alpine and opened a terminal session!
- if you see a white page for the terminal, try to log in to OnDemand using either Microsoft Edge or Google Chrome, Firefox is not supported right now
File Transfers
When doing your microbiome analyses on Alpine, you will need a way to transfer files from your local computer to Alpine and vice versa. While there are several ways of doing this, our preferred way is to use OnDemand.
OnDemand
1. After logging in, click on Files. You will see paths to your Home, Scratch, and Projects directories. Click on the scratch directory!
2. This will show you all your folders and files in that directory.
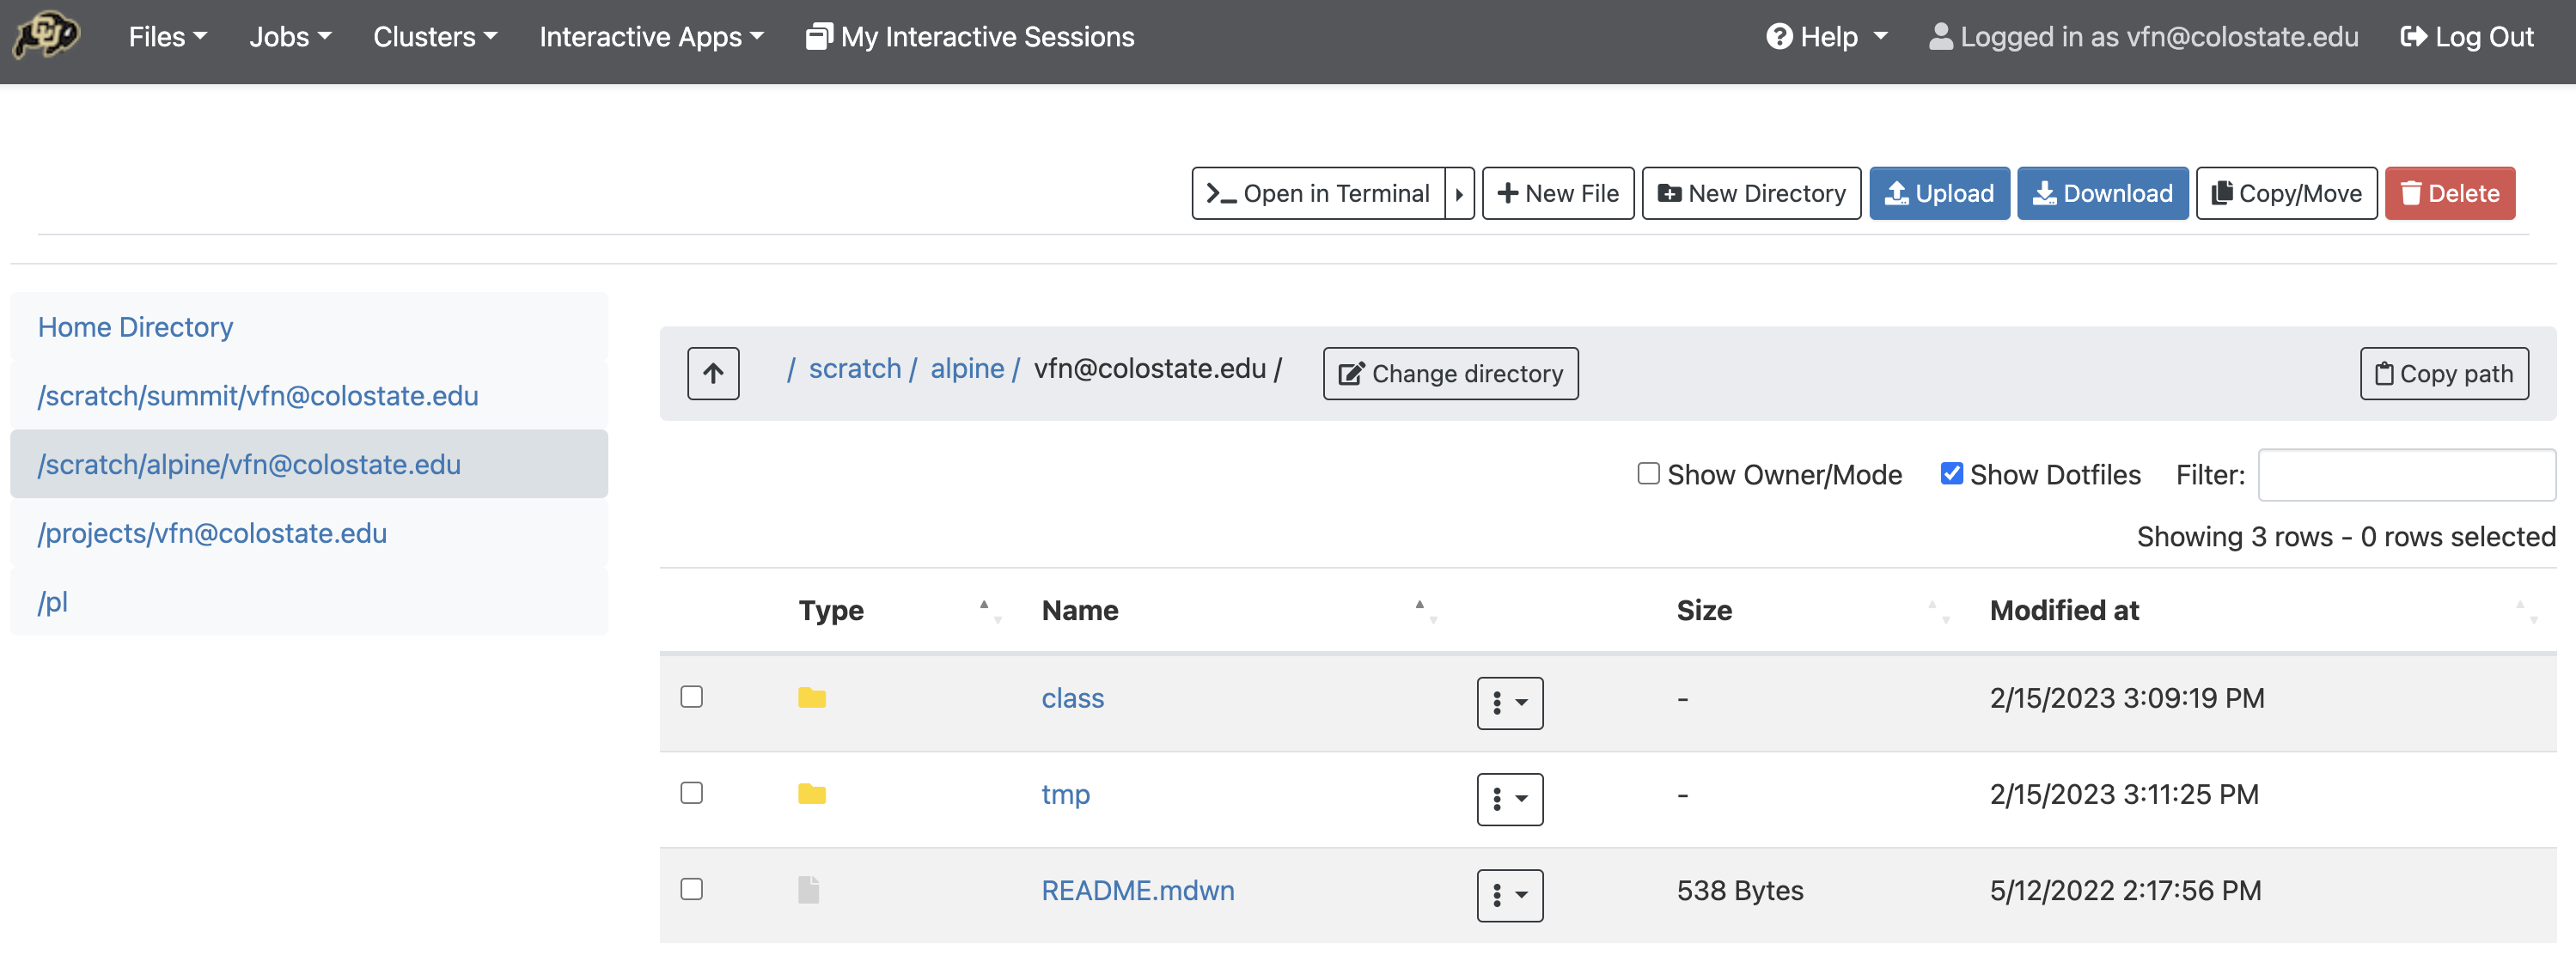
3. From here you'll be able to:
- Download files
- Upload files
- Rename files
- Delete files
- Edit files
- View contents of a file
- Open a terminal window from that location
Lets practice!
1. Using OnDemand, create a new folder in your scratch directory, call it "test" 2. Open the directory, and create a new file, call it "test_file.txt".
Linux Navigation
Now we will go over general commands to use on the command line. These will work on MacOS and Linux systems, but not necessarily PCs. Here is the "anatomy" of what a basic command might look like. It is important to know a few basic commands in linux so you can easily navigate the terminal as well as OnDemand.
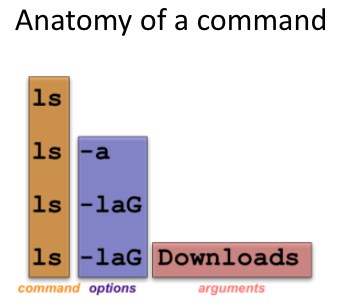
- First, you have the command itself.
lsis a command that says to list the files in your current working directory, which you can think of as the "folder" you are currently in. - You can supply options to the command.
- For example,
ls -ais saying to list all of the files in your current directory, including any hidden files that start with a period (called "dot files") - The
-loption says to list the directory contents in a long listing format - The
-Goption says to not print group names in a long listing - Explore more options to supply to the
lscommand (https://man7.org/linux/man-pages/man1/ls.1.html)
- For example,
- You can supply arguments to the command.
- The last line of the graphic above is saying to list all hidden files in a long listing format in the Downloads directory.
These are some common commands that you should learn, as we will use them throughout the semester:
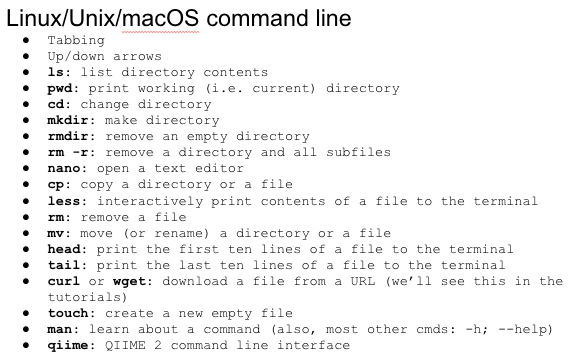
Now let's explore
- Launch a terminal window
- See what folder you’re in
- Navigate to your scratch directory using an absolute file path
- Enter into that folder
- Create a new txt file name it “test”
- Write yourself readme file that describes what files are in this folder and save it
- Print out what’s in that file to your screen
1. Use OnDemand and open up a terminal session, if it is not still open from the first one we opened.
- We have just logged into Alpine, so where are we?

- Let's use `pwd`, for "print working directory". The "pwd"  in different font below is our first example of a "code chunk", which are things that you should make sure you run along with me.
1. You should see an output that looks like /home/USER@colostate.edu. Remember the three different types of spaces (home, projects, scratch). We landed in the "home" space!
2. We almost never want to be in "home". Lets navigate to scratch.
3. We can do this in one command (change "USER" to your username)
We did this usingcd, or "change directory."
example: cd /scratch/alpine/jsmith@colostate.edu
To see what files and folders are in our scratch directory, use the "list" command. you should see the folder you created earlier.
Now let's navigate to the directory we created earlier.
This is a good time to talk about relative vs absolute paths.
- An absolute path is the path directly from the root, as shown above when we used
cd /scratch/alpine/USER@colostate.edu - A relative path is a path based on where you are now. For example, if I am in the "
/scratch/alpine/USER@colostate.edu" directory, the path to get to the "test" directory would be:cd test- To move in and out of directories, you can use
cd ../to move out of the directory by one level
What this lecture covered
- Logging into Alpine via OnDemand and SSH
- Requesting an interactive session (
sinteractive --reservation=microbiome --time=04:00:00 --partition=amilan --nodes=1 --ntasks=6 --qos=normal) - Project, scratch, and class-folder paths
- Day-to-day Linux commands:
cd,ls,cp,mv,rm,cat,less,mkdir,module load,tab-complete - The difference between relative and absolute filepaths.